The big day had arrived. All gaskets, seals and other minor parts had arrived. All the necessary gasket glue and goo substances were ready. The Haynes manual was ready to go. A plethora of zip-lock bags quivered in anticipation of their imminent opening. And finally, at the heart of it all, the one incorrect part, 4GO-17433-01, was to triumphantly replace the incorrect part with one which would allow the clutch pushrod to pass through unimpeded. I opened the bag of this final piece of the puzzle, and…
It looked just like the old one.
Crap.
What the hell was going on? There was no way that this could be right. I had looked at the diagram, and there it was – a thing called a nozzle on the end of the transmission shaft. I knew the old clutch pushrod had worked in the old motor, so why wasn’t it working on the new one?
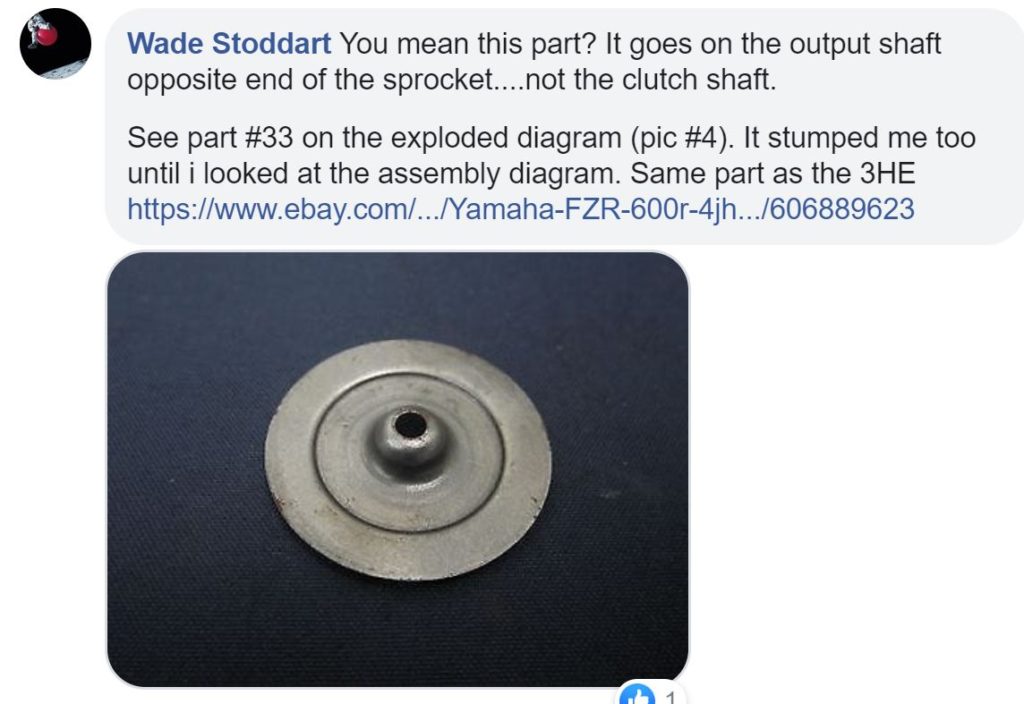
In desperation, and before I decided to go to ‘Plan B’ and strip down the old motor to find out what the heck was going on, I turned to the internet, and once again the FZR group on Facebook was my saviour. I asked the question of what the heck was going wrong, and then some guy from Canada came to the rescue…

The part was on the wrong shaft.
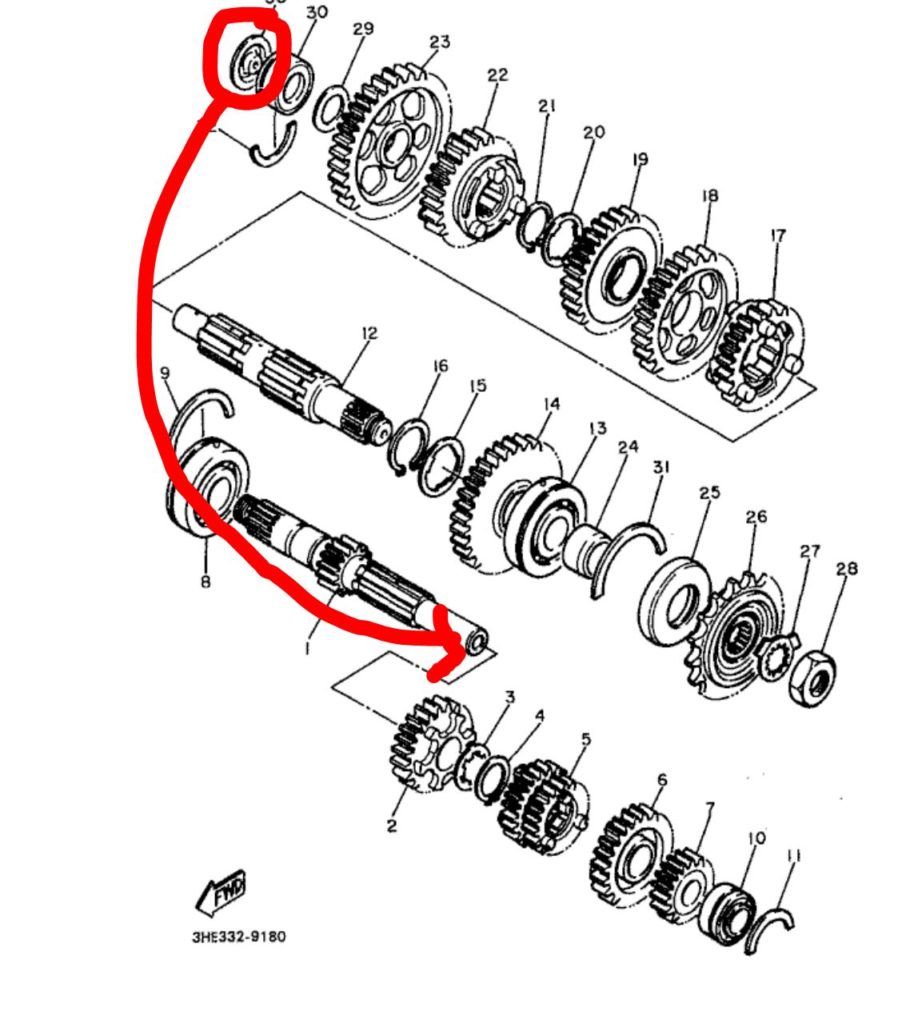
To illustrate this better…

Yep, the former builder had put the part diagonally opposite where it was meant to be. I’d been looking at the diagram, but I’d been reading it back to front.
The pushrod was never going to fit through that hole.
This motor never could have worked when used with a standard clutch setup.
This then made me contemplate what the real story was behind the motor. While it is plausible that the previous owner had managed to get some alternative clutch mechanism set up, it was far more likely that this motor had either been rebuilt without any intention of installing it, or it had been rebuilt and at the time of putting it into the frame the wrong part was identified and the toys were thrown out of the cot. I’ll be honest, if I had just done a rebuild and I had discovered one minor part out of place that would require me to go back and do the whole thing again, I’d have probably contemplated throwing the towel in too.
This led me to wonder, as I should have done all along, what other parts were potentially missing here?
A closer look at the motor diagram showed up two additional faults.
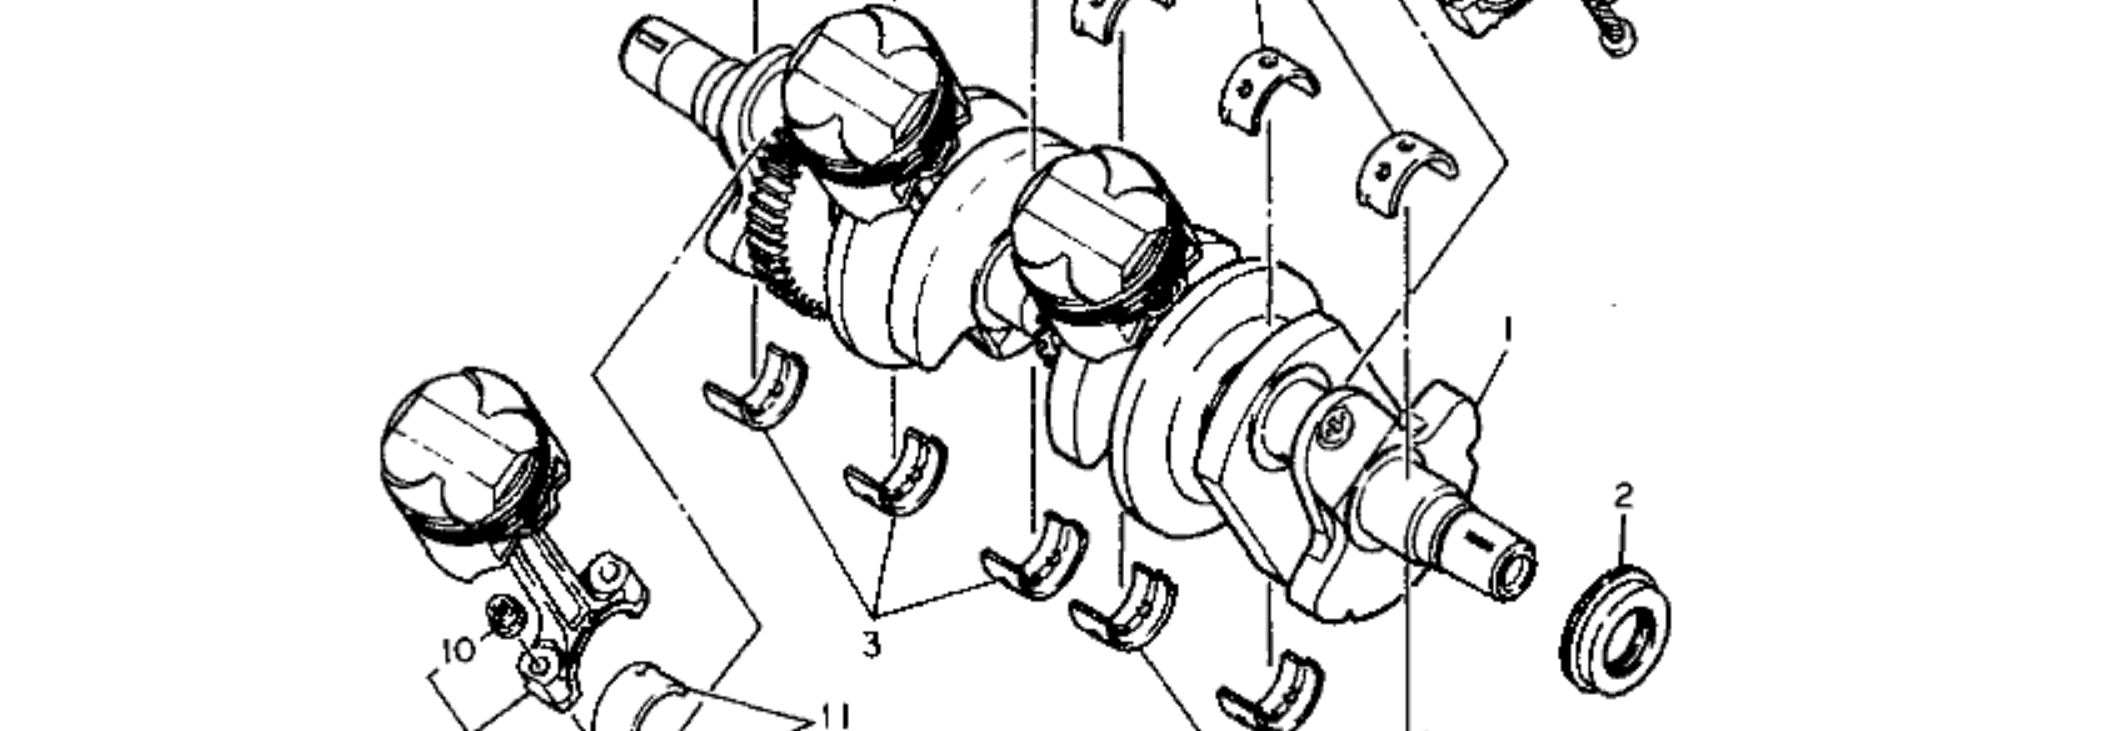
First up, a spacer and one of the transmission gears had been installed back to front (23 and 29 on the diagram above) – easy fixed. But there was a small but critical omission as well – an oil seal that should have been sitting on the end of the crankshaft wasn’t there. Completely missing. And I had missed it when I was buying parts.
So this now meant that four faults had been at play in by Gumtree special motor. This thing would never have run if I had installed it. At best it would have leaked like a sieve. At worst it would have completely eaten itself. Tearing it down, as painful as it was being, had avoided disaster.
The moral? Never, ever trust a rebuilt motor from the interwebs – the only way you’ll really ever know a motor is if you rebuild it yourself.
A quick trip to my local Yamaha dealer confirmed what I suspected about the missing oil seal – that it would have to come from Japan, which meant another couple of weeks of waiting before the rebuild could commence. That said, it was a small price to pay in comparison to what could have been a complete disaster if I had installed the motor without disassembling it and doing a forensic check of all components.
What this did was give me more time to tidy up some other bits, and so it seemed a good time to look a little further North than my previous painting adventures.
Next up: Killing time with paint
PS Massive thanks to Wade Stoddart from somewhere in Canada for solving this mystery. Between him and Bill Bryant from Queensland I think I owe several slabs of beer for their help and support.
